When was the last time you checked your Workshop Settings in Showcase Workshop? Been a while? Never heard of these magical settings? No idea what a “workshop” even is? Ok, let's go!
A Workshop is what we call the overarching account where your content lives. When you sign up for a 14-day free trial, we create a brand new Workshop for your company. You can add users to your company’s account so they can see all the swish content you create.
Most of our customers have one Workshop, but some larger companies have two or more. If you have access to more than one Workshop, we keep the content completely separate to avoid confusion.
If you’re an Admin user, you’ll have full reign over your Workshop settings. And there are lots of fun things you can do to personalize your Workshop and how users interact with it. Let’s dive right in, shall we?
How to find your Workshop Settings
First, a note on how to actually find your Workshop Settings. You’ll need to do this from the web platform (not the mobile app). To access the settings page, click the Settings cog icon in the top right corner.

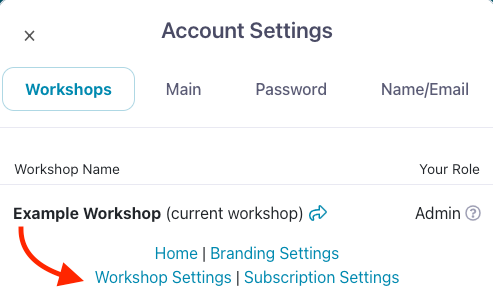
You’ll see a pop-up box called Account Settings. For today’s adventure, you’ll want to select Workshop Settings under your Workshop name.

Alright, now that we’re (literally) on the same page, let’s take a look at all the things you can edit from Workshop Settings.
Rename your workshop
When you (or a member of your team) signed up for a trial, we would have generated a new Workshop for you and named it “My Workshop”. Now, you can keep that name if it really speaks to you but, chances are, you’ll want to change it to something a bit more personal.
Most people name their Workshop after their company or team, but you can call it whatever you like. We recommend choosing a name that your team will instantly recognize so that when you invite users to join Showcase, they won’t get confused or immediately delete the email.
You can rename your Workshop under the Edit Workshop section. Simply type your new name into the text field and hit Save!

Access
Now, let’s scroll down to the Access section.
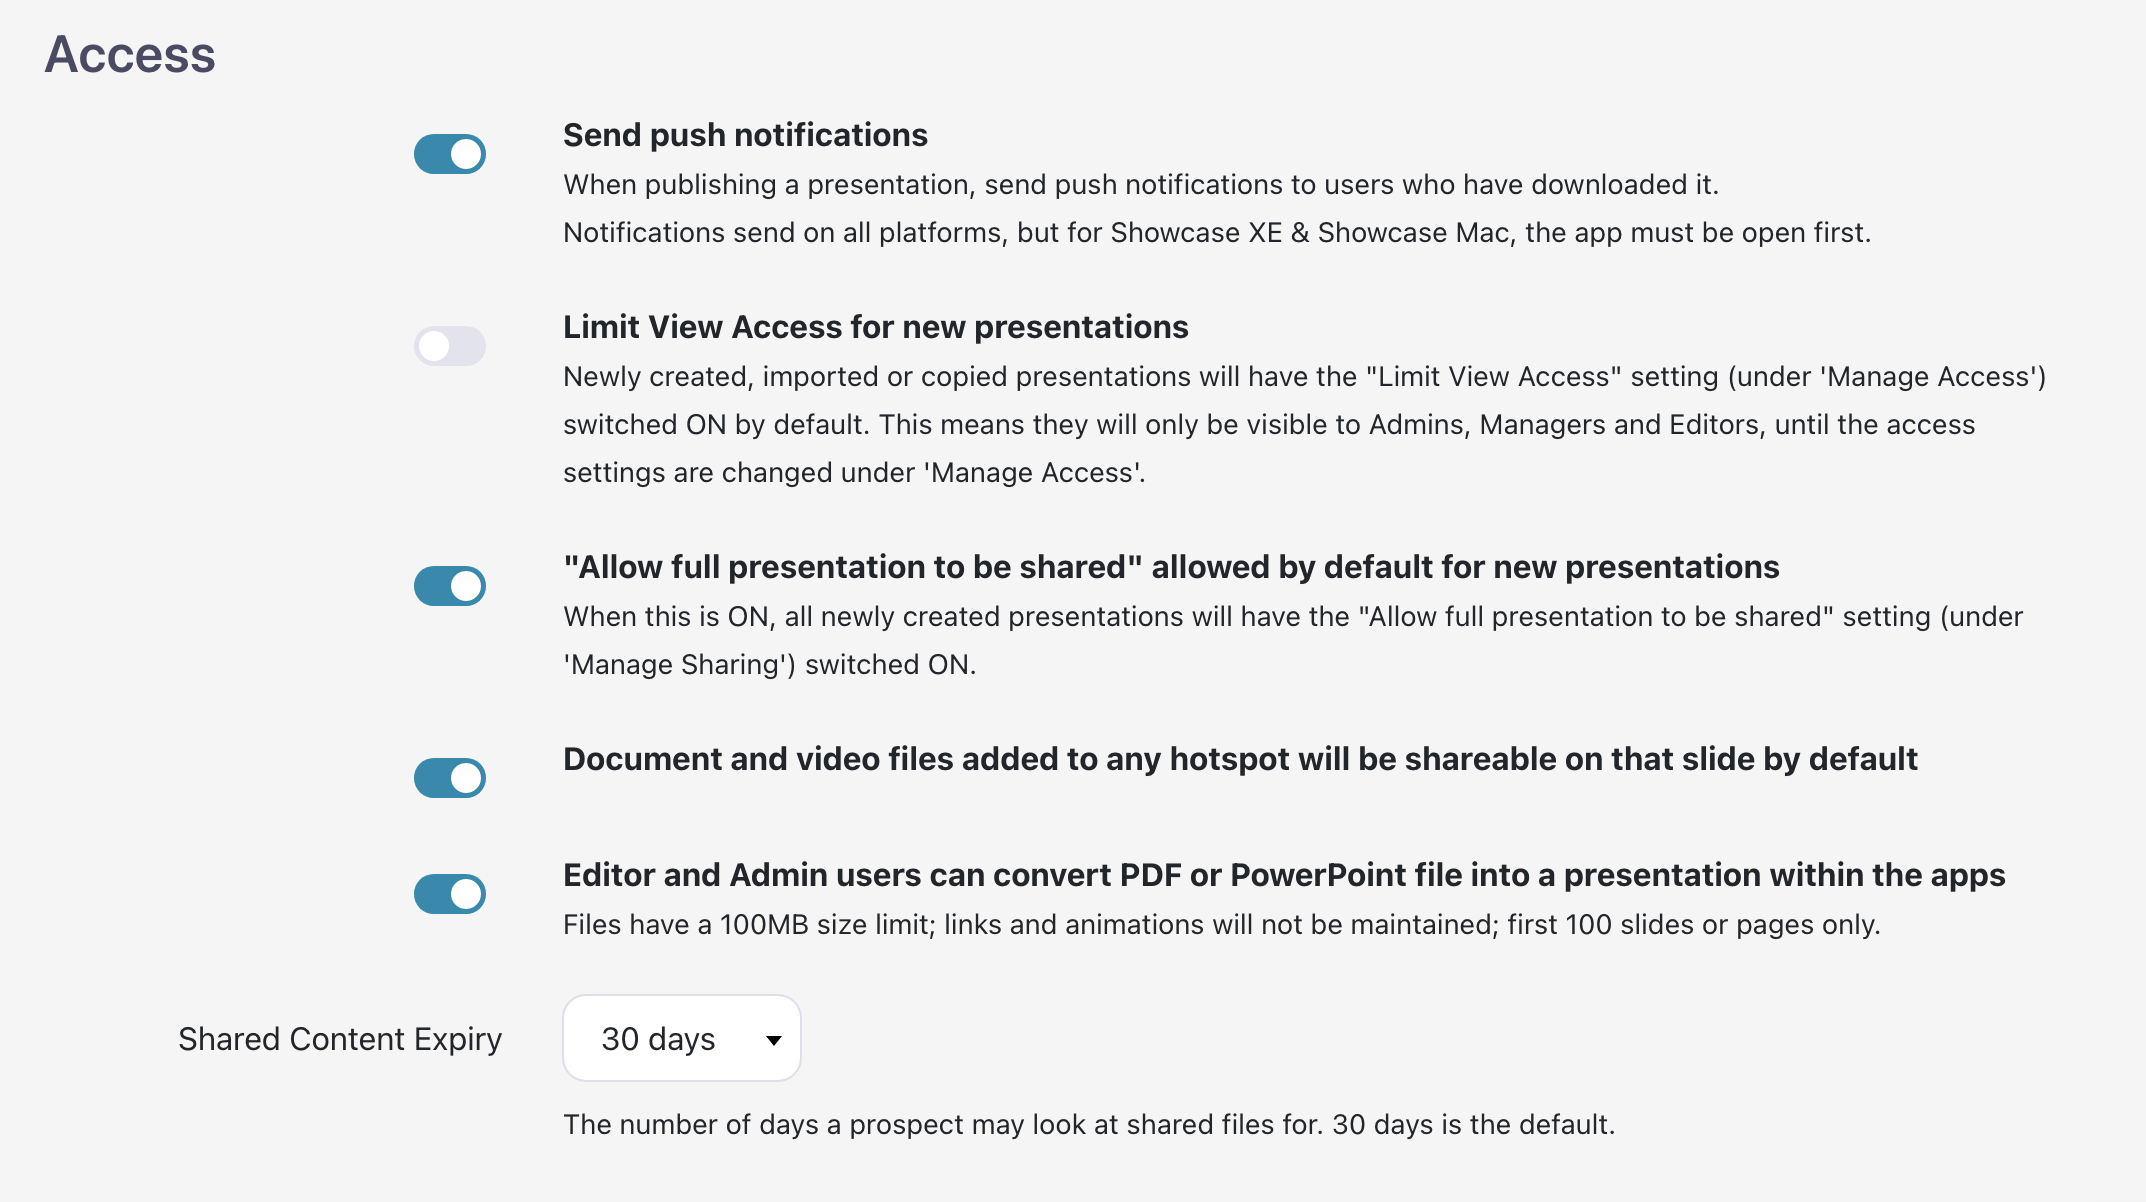
Here, you can control the default access settings for your entire Workshop. This affects how other users interact with Showcase on a broad level.
Note: Check out this Knowledge Base article to learn how to change access permissions for specific presentations.

To edit your Workshop’s default access settings, toggle each option on or off as desired. You can control whether:
- Users get a push notification on their device when you publish — or re-publish — a presentation (of course, whether users actually see this notification depends on whether they’ve allowed Showcase notifications on their device)
- Access to view newly created presentations is automatically limited to Admins and Editors
- Users can automatically share full presentations by default (this will only affect new presentations, not existing ones)
- Any documents or videos added to hotspots are automatically made shareable from that specific slide
- Editors and Admins can convert PDF or PowerPoint files into presentations in the Showcase app (they’ll still be able to import PDFs and PowerPoint presentations on the web platform!)
You can also change how many days shared content remains available to sharing recipients from the Shared Content Expiry drop-down menu. The default timeout period is 30 days, but you can change it to 7, 14, 30, 60, 90, 180 days — or even unlimited. Changing this setting won’t affect any content that’s already been shared; it will only affect content shared after you make the change.
Data API
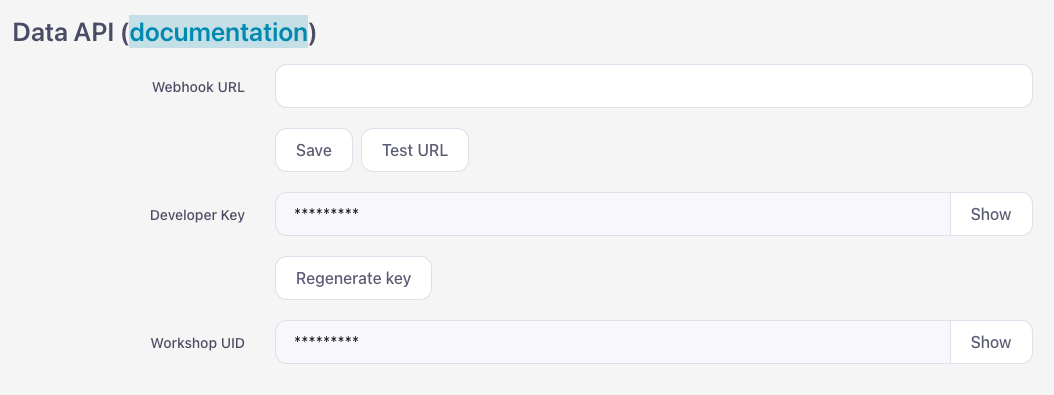
Alright, here’s where things get technical, folks. Under the Data API (documentation) section, you’ll see three fields for setting up a basic webhook-based integration in Showcase.

What’s a webhook, you ask? Excellent question!
A webhook is an automated message that an app sends when a specific event occurs; it’s how integrated apps communicate with each other. For example, if you’ve got PayPal connected to your accounting software, PayPal can send a message to that software when you get paid. Or, if you’ve got a WooCommerce integration set up in Slack, you’ll get notifications via webhooks sent to Slack.
You can set up a basic webhook by adding the specific URL to the Webhook URL field. This is best used with data from a form embedded into your presentation.
If you’re brand new to webhooks or forms, get in touch with our team of nerds and we’ll get you sorted!
Partner Workshops
If your company is on the bigger side or you have multiple distributors around the country (or world), you may have multiple Workshops to keep your content streamlined. But what if you want to give users in another Workshop access to your presentations?
This is where Partner Workshops come in. You effectively link two or more Workshops, and Admin users choose which presentations they want to share with which Workshop. Showcase then creates a read-only copy of the shared presentations in the chosen Workshop(s). If you make any changes to the original version, the copied presentations will be updated too so you don’t have to worry about version control or outdated copies floating around out there!
This is particularly useful for controlling distributor access to sales collateral. You provide the marketing materials and leave each distributor to manage their own users and internal presentations.
You can set up Partner Workshops under the aptly-named Partner Workshops section. Pop your Partner Workshop's key into the Existing Partners box and click Add.

Note: If you don't know your Partner Workshop’s key, ask one of their Admin users to send it to you (or switch between the two Workshops yourself). The workshop key will be in the same place under their own Workshop Settings; it’s the automatically-generated code next to Your Partner Workshop Key.
Your Partner Workshops will appear in a list in the Existing Partners section. You can remove them at any time by clicking the Remove link next to the Workshop name. Don’t forget to give each Workshop access to the specific presentations you want to share!
Hotspot URL User JWT Secret
At first glance, the Hotspot URL User JWT Secret section looks both high-tech and mysterious. And it is, in a way!

This ultra-advanced option is something you need if you want to 'pass' information about a logged-in user through a hotspot. For example, if you want to pre-populate a web form with a user's email address.
Since this is so high-tech and mysterious, we recommend having a chat with our nerds before you try implementing it. Drop us a line and we’ll talk you through everything you need to know!
Delete Workshop
So, you’ve had enough of us and want to delete your entire Workshop. We hope it’s not something we did, but we get it. If it’s not something that our friendly helpdesk team can help you with, feel free to… wait! Hold up! This isn’t actually something you can do from here.
I know, I know. Why is there a section titled Delete Workshop here, then? Well, we wanted to give you easy-to-follow instructions on how to get the ball rolling. But, since many Workshops have multiple Admin users, it’s safer for us to control the actual deletion — rather than any one user having the ability to do something that can’t be undone. That would be a bit of a disaster.

Instead, we kindly ask you to email us if you ever decide you’ve had enough Showcase. This way, we can make sure everything is squared away properly before we remove any of your content from our system. And, if you just need to take a break from us, we can discuss all your options.

As you can see, there’s a whole lot you can control from the Workshop Settings page! Why not set aside some time this week to review your Workshop Settings, and let us know if you’d like a hand setting up any of the more advanced settings.