Have you ever wanted to make your own slideshow in Showcase Workshop, only to discover you don’t have access to editing? Do you find yourself presenting from your Favorites more than the actual presentation? Gee whizz, have we got the feature for you!
It’s true that Editors have a lot of power in Showcase Workshop. They can create, edit, and delete entire presentations, as well as decide when those presentations become available to Viewers on the app.
And Admins? Well, let’s just say they’re the ones you want to befriend if you want to get a bit more control. They can do everything Editors can do — and they get to manage all users in the workshop, including adding and removing users, resetting passwords, and changing user roles.
I told you you’d want to befriend them.
Until recently, Viewer users had more of a read-only role in a workshop. They could download, present, and share presentations — and manage their own account and sharing history — but… they couldn’t do a lot in the way of customization.
That’s all about to change.
Viewers are the backbone of many organizations; they’re the ones out in the field (sometimes literally) meeting potential customers and making the sales.
They’ve always had sales power; now they’re getting a different kind of power...
Soon, Viewers will be able to create their own versions of presentations using existing slides created by Admins and Editors. The content itself won’t change, so it will always be on-brand and up-to-date. But you’ll be able to pull together a set of slides to create a truly unique presentation.
This allows you to create presentations that are completely tailored to your prospect and their needs. If you find there are certain slides you never touch, you can simply create a presentation without them.
You’ll look professional and position yourself as the expert you are when you know the presentation back to front — and if you forget something, you can always use the handy ‘Search’ function to find it without losing your prospect’s attention
Alright, let’s learn how to create a personalized slideshow
Before anything else, your Admin has to have turned this feature on for you. If you can’t see it, hit them up and get them to read “The Admin Experience” section in the second half of this blog!
First, find the slide that you want to be the first slide in your custom slideshow.
You could pick a slide you’ve previously favorited, search for the slide you want, or simply navigate through the presentation until you get to the right place.
In this example, we'll be starting with this slide in our presentation about Showcase Workshop.
What you need to do is click or tap the hamburger button in the bottom left of the screen (it's the one that looks like three horizontal lines):
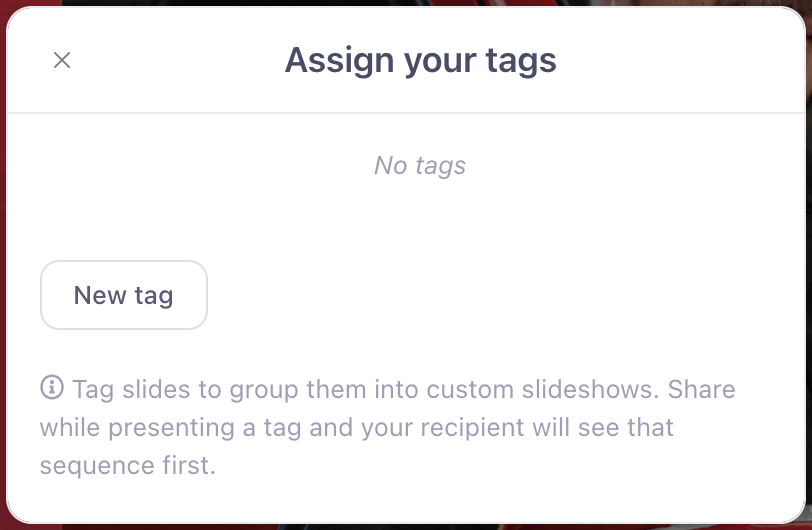
This will open a side panel on the left where you'll see a fancy new option called 'Tags'. This is what you'll use to curate your presentation.

Let’s hit that button (no time like the present) to open our new Tags dialog box.

Hmm. It's looking a little empty. Try clicking 'New tag' and typing something in that box, then hit 'Create'. Now's your chance to channel your favorite Twitter and LinkedIn hashtags! #BestPresentationEver

Once you've applied your tag, you can go ahead and find another slide to appear in your slideshow.
We've chosen this glowing testimonial from Mitsubishi Motors:
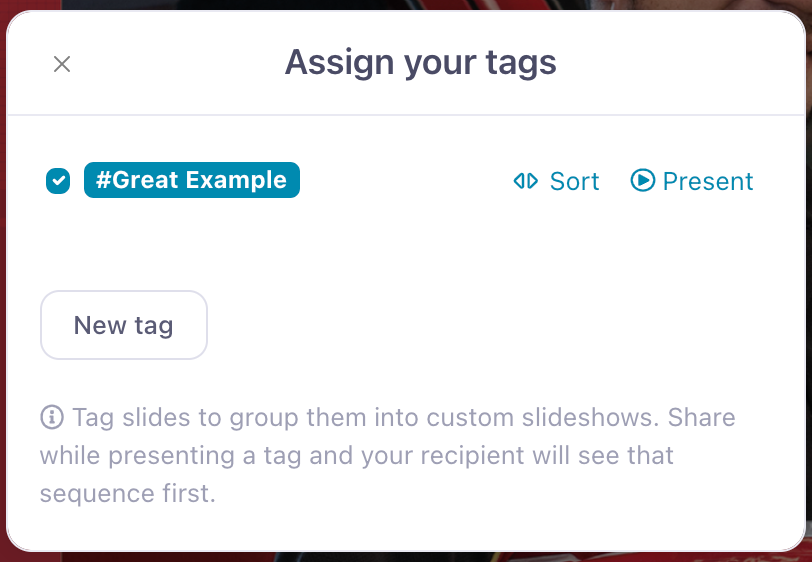
When you hit 'Tags' this time, you'll see your pre-existing tag at the top of the dialog box. Simply tick the checkbox next to your chosen tag to add it to the current slide.

Once you've got a selection of slides under that tag, open up the 'Tags' dialog again and hit the 'Sort' button next to the tag name.
You can reorder the slides by clicking and dragging them, or you can click the thumbnail and use the arrows to move it to the left or right. To remove a slide from the tag entirely, click on the thumbnail and hit the trashcan icon.
Want to change or delete the entire tag? Use the buttons in the top right corner! Don’t worry — this won't delete the slides from the actual presentation; it will simply remove the association between the tag and the slides.
When you're ready to present your slides to a prospect, go ahead and hit 'Present' — either from the 'Sort' screen or the main 'Tags' dialog.
Top tip: You can do this from any slide in the presentation — even if it hasn't been tagged!

Tags are individual to each user, so you won't be able to tell your colleague in a separate office to load up your tag as they’ll have their own tags going on.
You can also apply more than one tag to a slide. Each tag becomes it's own custom slideshow, so you can reorder the slides any way you please without impacting your other tags!
Sharing Your Custom Slideshow
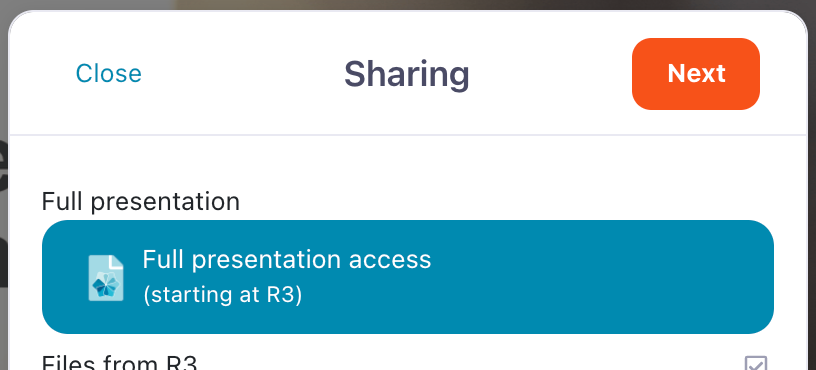
Here’s the really cool part: If you share the full presentation with a prospect while presenting your custom slideshow, your prospect will see your carefully-curated sequence of slides first.

It’s kind of like sending someone a brochure that you’ve opened to a certain page — and stuck post-its on a couple of other pages for good measure. The recipient can still navigate around the rest of the presentation, but they’ll see the most relevant stuff first.
Note: You'll only be able to do this if the full presentation is shareable; if it's not, try asking your Admin user(s) nicely to change the settings.
The Admin Experience
Admin users can control whether Viewers can create tags at all by toggling the 'Enable Viewer tags' option from the 'Manage Access' dialog.
This is controlled on a per-presentation basis, so you can allow tags in one presentation but not another.
Tags are going to be switched off by default for all existing presentations. For new presentations, tags will be switched on unless your workshop is set up to limit access for all new presentations to Admins and Editors.
Note: Unlike the other access options in the 'Manage Access' dialog, you will need to republish your presentation if you switch tags on or off.
You can see which slides have been tagged from a presentation's outline.
Since tags are individual to each user, you won't be able to see what they're naming their tags — but you'll be able to see how many times a slide has been tagged.
Tags vs Favorites
Favorites are more like one big bucket full of bookmarks; you can't sort or group them, so they're most useful if you want to jump to a specific part of an existing slideshow.
Say you have a slideshow about pumpkins and the last four slides are solely about pumpkin soup. If your prospect is really into pumpkin soup, you can Favorite the eighth slide and jump straight to the pumpkin soup section. Since the remaining four slides are already in the order you want, you wouldn't need to tag them separately.
Similarly, if you have a submenu all about sourdough with links to recipes on separate slides or documents, you can favorite that submenu; then, you'd be able to jump straight to that slide and navigate to the relevant recipes from there. Again, you wouldn't need to tag that slide because the navigation structure from that point already works for you and your prospect.
Favorites will still exist independently as quick reference bookmarks for certain parts of your presentations. If you want to swipe through your Favorites or share them to a prospect as a set, that's when Tags come in handy.
Ultimately, Tags are going to give Viewers some well-earned freedom to collate presentations that work for you and your prospects. Use them to create tailored pitches and mini presentations, and share them with prospects to give them access to the exact material you want them to see. The sky's the limit!
Tags are scheduled to go live in the web app this week, and we'll be rolling it out to device apps in the next few weeks. Stay tuned!
As always, if you have any feedback or questions about Tags, fire them through to us — we love hearing from you!
If you haven't tried Showcase Workshop yet, grab your 14-day free trial today and see how Viewer Tags could work for your sales team!